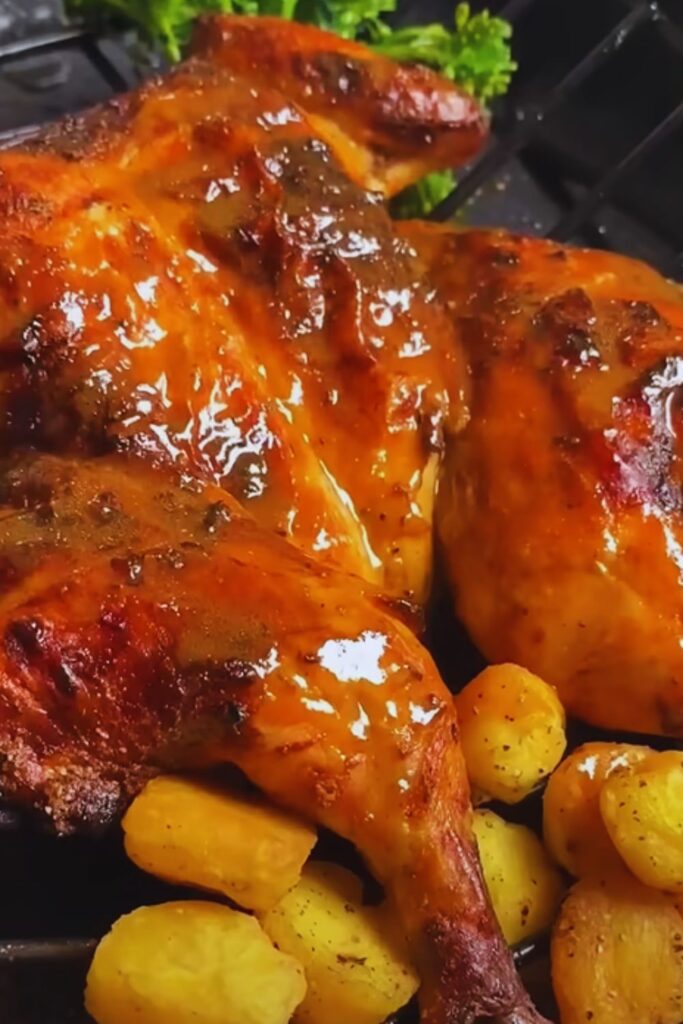
There’s something deeply comforting about walking into a home filled with the aroma of roasting chicken and garlic. The scent wraps around you like a warm embrace, promising a meal that will satisfy not just your hunger but also your soul. I’ve been perfecting this Rustic Roasted Garlic Chicken with Asiago Gravy recipe for years, and it’s become my go-to dish for Sunday family dinners and special occasions alike.
Why This Recipe Works
When I first started cooking, I was intimidated by whole chickens. They seemed complicated and easy to mess up. But I’ve learned that a simple approach often yields the most spectacular results. This recipe relies on a few key techniques that ensure success:
- Dry brining: Salting the chicken ahead of time leads to juicier meat and crispier skin
- Slow-roasted garlic: Mellow, sweet garlic cloves that practically melt into the gravy
- Two-temperature roasting: Starting hot to crisp the skin, then lowering the heat to gently cook the meat
- Asiago infusion: The nutty, complex cheese adds dimension to what would otherwise be a standard pan gravy
The result is a chicken that’s golden and crisp on the outside, incredibly juicy on the inside, and a gravy so good you’ll want to drizzle it on everything in sight.
Ingredients
For the Chicken:
- 1 whole chicken (4-5 pounds), giblets removed
- 2 tablespoons kosher salt
- 1 tablespoon freshly ground black pepper
- 2 teaspoons dried thyme
- 2 teaspoons dried rosemary
- 2 tablespoons olive oil
- 3 whole heads of garlic
- 1 lemon, quartered
- 2 sprigs fresh rosemary
- 2 sprigs fresh thyme
- 1 medium onion, quartered
For the Asiago Gravy:
- Pan drippings from roasted chicken
- 3 tablespoons all-purpose flour
- 2 cups chicken stock, preferably homemade
- 1/2 cup heavy cream
- 3/4 cup grated Asiago cheese
- 1 tablespoon fresh thyme leaves
- Salt and freshly ground black pepper to taste
Equipment
I’ve found that having the right tools makes this dish even easier to prepare:
- Large roasting pan with rack
- Kitchen twine
- Instant-read meat thermometer
- Aluminum foil
- Fine mesh strainer
- Whisk
- Gravy boat
Preparation
Dry Brining the Chicken (12-24 hours ahead)
- Remove the chicken from packaging and pat completely dry with paper towels. This step is crucial for achieving crispy skin.
- In a small bowl, mix together the kosher salt, black pepper, dried thyme, and dried rosemary.
- Sprinkle the seasoning mixture all over the chicken, inside and out. Be generous.
- Place the seasoned chicken on a wire rack set over a baking sheet and refrigerate, uncovered, for 12-24 hours.
Preparing the Garlic
The garlic in this dish transforms from pungent and sharp to sweet and mellow. Here’s how I prepare it:
- Cut the top third off of each head of garlic, exposing the cloves inside.
- Drizzle each head with a teaspoon of olive oil.
- Wrap each head loosely in aluminum foil, creating little packets.
Cooking Instructions
Roasting the Chicken
- Remove the chicken from the refrigerator 1 hour before cooking to take the chill off.
- Preheat your oven to 425°F (220°C).
- Stuff the chicken cavity with the quartered lemon, fresh herb sprigs, and one quartered onion.
- Truss the chicken by tying the legs together with kitchen twine. Tuck the wing tips behind the chicken’s back. This promotes even cooking.
- Place the chicken breast-side up on a rack in a roasting pan.
- Brush the outside of the chicken with the remaining olive oil.
- Place the foil-wrapped garlic heads around the chicken in the roasting pan.
- Roast the chicken at 425°F for 30 minutes, until the skin begins to turn golden.
- Reduce the oven temperature to 350°F (175°C) and continue roasting for approximately 1 hour, or until an instant-read thermometer inserted into the thickest part of the thigh registers 165°F (74°C).
- Remove the chicken and garlic from the oven. Transfer the chicken to a cutting board and let it rest for 15-20 minutes before carving. This resting period allows the juices to redistribute throughout the meat.
Making the Asiago Gravy
While the chicken rests, I make the gravy. This is where the magic happens:
- Pour the pan drippings into a fat separator or glass measuring cup. Let stand briefly to allow the fat to rise to the top.
- Return 3 tablespoons of the separated fat to the roasting pan and place over medium heat on the stovetop.
- Unwrap the roasted garlic heads and squeeze the softened cloves into the pan. They should be soft and golden.
- Mash the garlic cloves with a fork and stir them into the fat.
- Sprinkle the flour over the fat and garlic mixture, whisking constantly to form a roux. Cook for about 2 minutes, until it smells nutty and turns a light golden color.
- Slowly pour in the chicken stock, whisking continuously to prevent lumps from forming.
- Add the reserved pan drippings (minus the fat).
- Simmer for 5-7 minutes, until the gravy begins to thicken.
- Whisk in the heavy cream and continue to simmer for another 2-3 minutes.
- Add the grated Asiago cheese in small handfuls, whisking between additions until fully melted and incorporated.
- Stir in the fresh thyme leaves and season with salt and pepper to taste.
- Strain the gravy through a fine-mesh sieve for a silky-smooth texture, if desired (though I often leave mine rustic with bits of roasted garlic).
Serving Suggestions
I like to serve this Rustic Roasted Garlic Chicken with Asiago Gravy on a large platter family-style, with the carved chicken arranged in the center and the gravy in a boat alongside. Some perfect accompaniments include:
- Creamy mashed potatoes to catch every drop of that delicious gravy
- Roasted root vegetables such as carrots, parsnips, and turnips
- A simple green salad dressed with lemon vinaigrette to cut through the richness
- Warm, crusty artisan bread for sopping up extra gravy
- Sparkling water with lemon wedges
Nutritional Information
For those watching their nutritional intake, here’s a breakdown per serving (assuming 6 servings from one chicken):
| Nutrient | Amount per Serving |
|---|---|
| Calories | 485 |
| Protein | 42g |
| Total Fat | 31g |
| Saturated Fat | 12g |
| Cholesterol | 165mg |
| Carbohydrates | 7g |
| Dietary Fiber | 1g |
| Sugars | 2g |
| Sodium | 820mg |
| Potassium | 460mg |
| Calcium | 180mg |
| Iron | 2.5mg |
Variations and Substitutions
While I believe this recipe is perfect as is, I understand the need for alternatives and substitutions:
Cheese Options
- Parmesan: More readily available and provides a similar nutty flavor, though less creamy
- Pecorino Romano: Sharper and saltier, reduce other salt in the recipe
- Gruyère: Melts beautifully and offers a sweet, nutty flavor
Herb Variations
- Sage: Particularly good in fall and winter
- Tarragon: Adds a subtle licorice note that pairs beautifully with chicken
- Oregano: For a more Mediterranean flavor profile
Dietary Adaptations
- Dairy-Free: Omit the cheese and heavy cream, use a roux-thickened chicken stock with a tablespoon of nutritional yeast for umami
- Gluten-Free: Substitute the all-purpose flour with cornstarch (mix with cold water first before adding to pan)
Make-Ahead Tips
I’ve found several ways to prep components of this dish ahead of time:
- Dry brine the chicken up to 24 hours in advance
- Prepare the garlic heads the day before and refrigerate in their foil packets
- Make chicken stock weeks ahead and freeze until needed
- Pre-grate the cheese up to 3 days ahead and store in an airtight container
Storage and Reheating
Leftover chicken and gravy can be stored separately in airtight containers in the refrigerator for up to 3 days. To reheat:
- For the chicken: Warm in a 300°F (150°C) oven, covered with foil, for about 20 minutes or until heated through. This prevents the meat from drying out.
- For the gravy: Reheat gently in a saucepan over low heat, whisking occasionally. You may need to add a splash of chicken stock or water if it’s too thick.
Common Mistakes to Avoid
Through years of making this recipe, I’ve identified some common pitfalls:
- Not patting the chicken dry: This prevents the skin from crisping properly
- Skipping the dry brine: This step is essential for flavorful, juicy meat
- Overcooking the chicken: Use a thermometer for accuracy
- Rushing the roux: Cook it long enough to eliminate the raw flour taste
- Adding cheese when the gravy is too hot: This can cause it to separate; let it cool slightly first
- Not letting the chicken rest: Cutting into it too soon will release all those precious juices
Chef’s Notes
I’ve made this recipe dozens of times over the years, and these are my personal insights:
- The quality of your chicken matters immensely. I prefer organic, free-range chickens for their superior flavor.
- Asiago cheese comes in different ages; I recommend using a medium-aged Asiago that will melt well while still providing good flavor.
- The garlic cloves can be spread on bread as an appetizer while waiting for dinner if you roast an extra head.
- Save the chicken carcass to make homemade stock for your next batch of gravy.
Q&A Section
Q: Can I use chicken pieces instead of a whole chicken? A: Absolutely! Bone-in, skin-on chicken pieces work beautifully with this recipe. Just adjust the cooking time accordingly – chicken breasts may take 35-45 minutes, while thighs could take 45-55 minutes at 350°F. Always use a meat thermometer to confirm they’ve reached 165°F.
Q: How do I know when the chicken is done without a meat thermometer? A: While I strongly recommend using a thermometer for accuracy, you can also check by piercing the thickest part of the thigh with a knife. The juices should run clear with no pink tinge. The leg should also move easily in the socket when wiggled.
Q: Is it possible to make this recipe dairy-free? A: Yes, you can make a delicious dairy-free version by omitting the heavy cream and cheese. Instead, create a flavorful gravy using the roasted garlic, chicken drippings, flour, and stock. Add a tablespoon of nutritional yeast for umami depth.
Q: Can I make this in a slow cooker? A: This recipe is best suited for oven roasting to achieve the crispy skin. However, you could adapt it for a slow cooker by skipping the initial high-temperature roasting. The skin won’t be crispy, but the meat will be tender. Cook on low for 6-7 hours. You’ll need to make the gravy separately on the stovetop.
Q: How many people does this recipe serve? A: A 4-5 pound chicken typically serves 4-6 people, depending on appetite and the number of side dishes served.
Q: Can I stuff the cavity with something other than lemon and herbs? A: Certainly! Quartered apples, onions, or even fennel bulbs make excellent alternatives for stuffing the cavity. Each will impart a slightly different flavor to the chicken.
Q: What’s the secret to really crispy skin? A: Three things ensure crispy skin: thoroughly drying the chicken before seasoning, leaving it uncovered in the refrigerator during the dry brining period, and starting the roasting at a high temperature (425°F).
Q: Why does my gravy sometimes become lumpy? A: Lumpy gravy usually happens when the flour isn’t fully incorporated into the fat before adding liquid. Make sure to whisk constantly when adding the flour to the pan drippings, and then add the stock gradually while continuing to whisk.
Q: Can this recipe be doubled for a crowd? A: Yes, but I recommend roasting two chickens in separate roasting pans rather than crowding them together. Overcrowding leads to steaming rather than roasting, which prevents proper browning and crisping. You can combine the drippings from both pans to make one large batch of gravy.
Q: How long will the gravy stay good in the refrigerator? A: The gravy will keep for 3-4 days in an airtight container in the refrigerator. It may thicken considerably when chilled; simply whisk in a little warm chicken stock when reheating to restore its silky consistency.
The beauty of this Rustic Roasted Garlic Chicken with Asiago Gravy lies in its simplicity elevated by a few special touches. It’s the kind of meal that creates memories around the dinner table – the conversation slowing as everyone savors each bite, the subtle request for seconds, and the inevitable question: “When can we have this again?” In my household, the answer is always “Soon.”